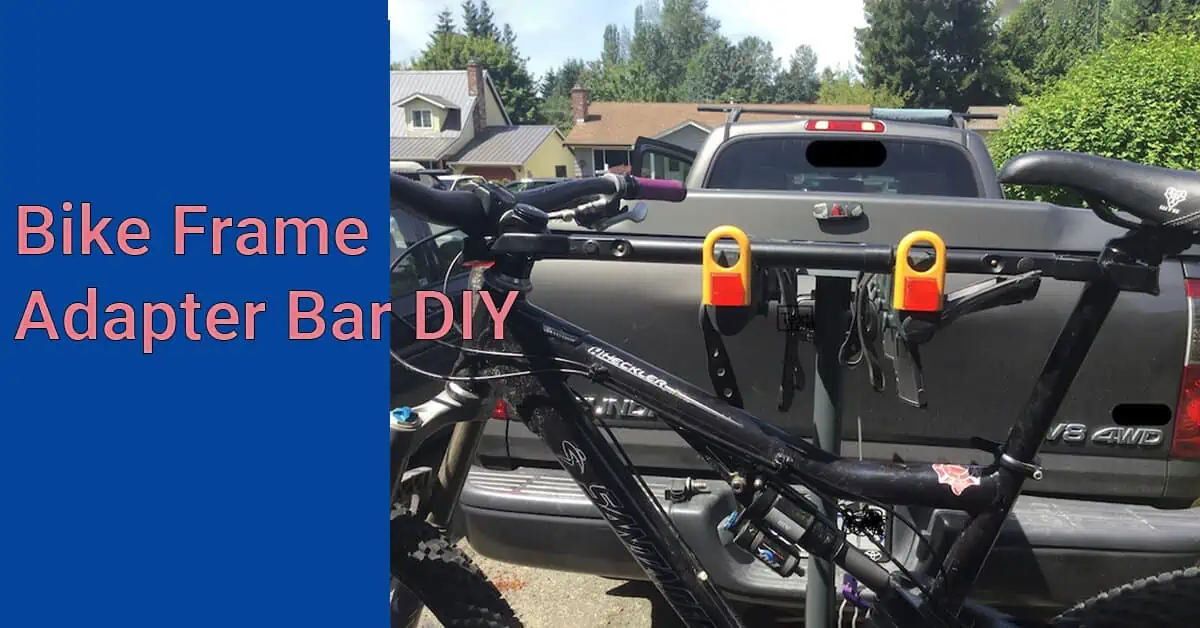
A bike frame adapter bar is a game-changer when it comes to securing your bike on a car rack. In this article, we’ll explore what it is, why you need it, and even share a budget-friendly DIY option. Let’s pedal into the details!
What Is a Bike Frame Adapter Bar?
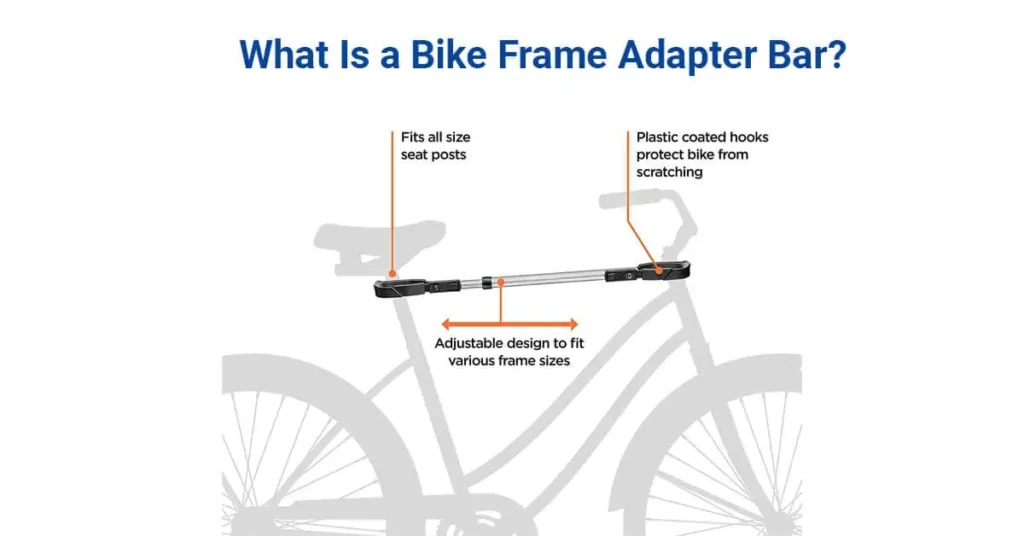
A bike frame adapter bar, a cross beam, a cross-bar top tube, or a level top tube, acts as a bridge between your bike’s seat tube and stem. When you have trouble mounting your bike neatly on a car rack, this adapter comes to the rescue. Here’s why you might need one:
- Non-Level Frames: If your bike lacks a level bar from the seat to the handle, it won’t sit securely on the rack. The adapter ensures stability and prevents wobbling during transport.
- Weight Distribution: When transporting multiple bikes without adapters, uneven frames can lead to one side of the rack bearing more weight. An adapter balances the load and provides peace of mind.
- Frame Compatibility: Some bike racks’ arm supports don’t fit well into the “triangle” of your bike’s frame. An adapter ensures a snug fit and minimizes the chance of stems rotating.
- Non-Standard Frames: If your bike has a unique frame shape, an adapter becomes essential.
Choosing the Best Bike Frame Adapter Bar
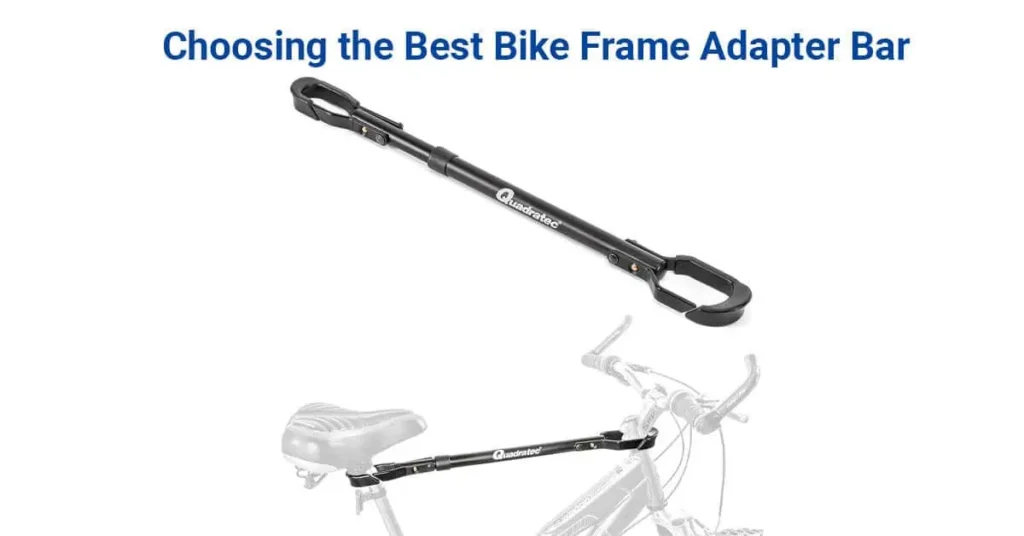
Consider the following factors when selecting an adapter for your bike rack:
- Size: Opt for an adjustable bike frame adapter that fits various bikes. Look for telescoping tubes that can be adjusted with a spring-loaded button. Ensure the extended length matches the distance between your seat post and headset.
- Durability: Aluminum, steel, or carbon fiber adapters are durable choices.
- Coating: Anti-rust coating is crucial. A well-coated adapter lasts longer.
- Ease of Use: Read reviews to determine if the adapter is easy to install 1.
DIY Bike Frame Adapter Bar
If you feel crafty, you can create your bike frame adapter bar. Here’s a simple DIY method:
Materials Needed:
- PVC Pipe: Choose a sturdy PVC pipe that matches the width of your bike’s top tube.
- U-shaped Brackets: These will secure the adapter to your bike.
- Rubber Bands: For attaching the brackets.
Steps:
- Measure and Cut: Cut the PVC pipe to the desired length (similar to a standard adapter bar).
- Bracket Placement: Set the pipe on your bike’s top tube. Use rubber bands to position U-shaped brackets where you want them.
- Drill Holes: Mark the holes in the brackets onto the pipe. Drill holes at these points.
- Attach Brackets: Secure the brackets to the pipe using bolts or pins.
- Test Fit: Attach the DIY adapter to your bike and test its stability.
DIY Bike Frame Adapter Bar Installation- In-Video
- Read How To Mount Bike On Thule Bike Rack
- Read Can A Thule Bike Rack Hold An Electric Bike
- Read Do E-Bikes Need Special Bike Racks?
Do I need a bike frame adapter?
If your bike lacks a level top tube or has a non-standard frame shape, a bike frame adapter is essential for secure transportation on car racks. It ensures stability and even weight distribution.
How do you use a false crossbar?
A false crossbar (bike frame adapter) bridges the gap between your bike’s seat post and handlebar stem. Simply wrap it around these points, secure the hooks, and ensure stability. It’s a game-changer for hassle-free bike transport!
Does anyone use an adaptor bar to carry their FS bike on a Hanging Style Bike Rack?
Yes, many people use adapter bars to carry their FS bikes on hanging racks for improved stability, safety, and wider compatibility.